Brownish, vintage-look recipe using Classic Chrome, inspired by the result of SilkyPIX Raw Converter!

11 0
Read Time:1 Minute, 37 Second

While I’m still in love with my Natura 1600 recipe for most of my leisure photowalks, I’d love to keep exploring any other settings that could make my photos more creative. Personally, I prefer my photos to be saved in JPG SOOC as I am just a hobbist and don’t want to spend too much time in post-editing. I just want to express them in nice look & feel, rather than making them perfect for pixel peeking.

Having said that, I found myself recently addicted to post-editing on my Fujifilm RAW files using SilkyPIX RAW Converter, which is a free tool bundled with the Fujifilm camera with great features like batch conversion and native film simulation settings in more granularity.

After several trials on the SilkyPIX, I have to admit that I need to put more time in post-editing. The limited capabilities and granularity of the film simulation from the in-built camera may hinder the creativity and quality of the photos taken. They deserved to have better results when putting a little bit more time in post-editing. Again, my preference is to use minimal of my time to achieve the best available results.

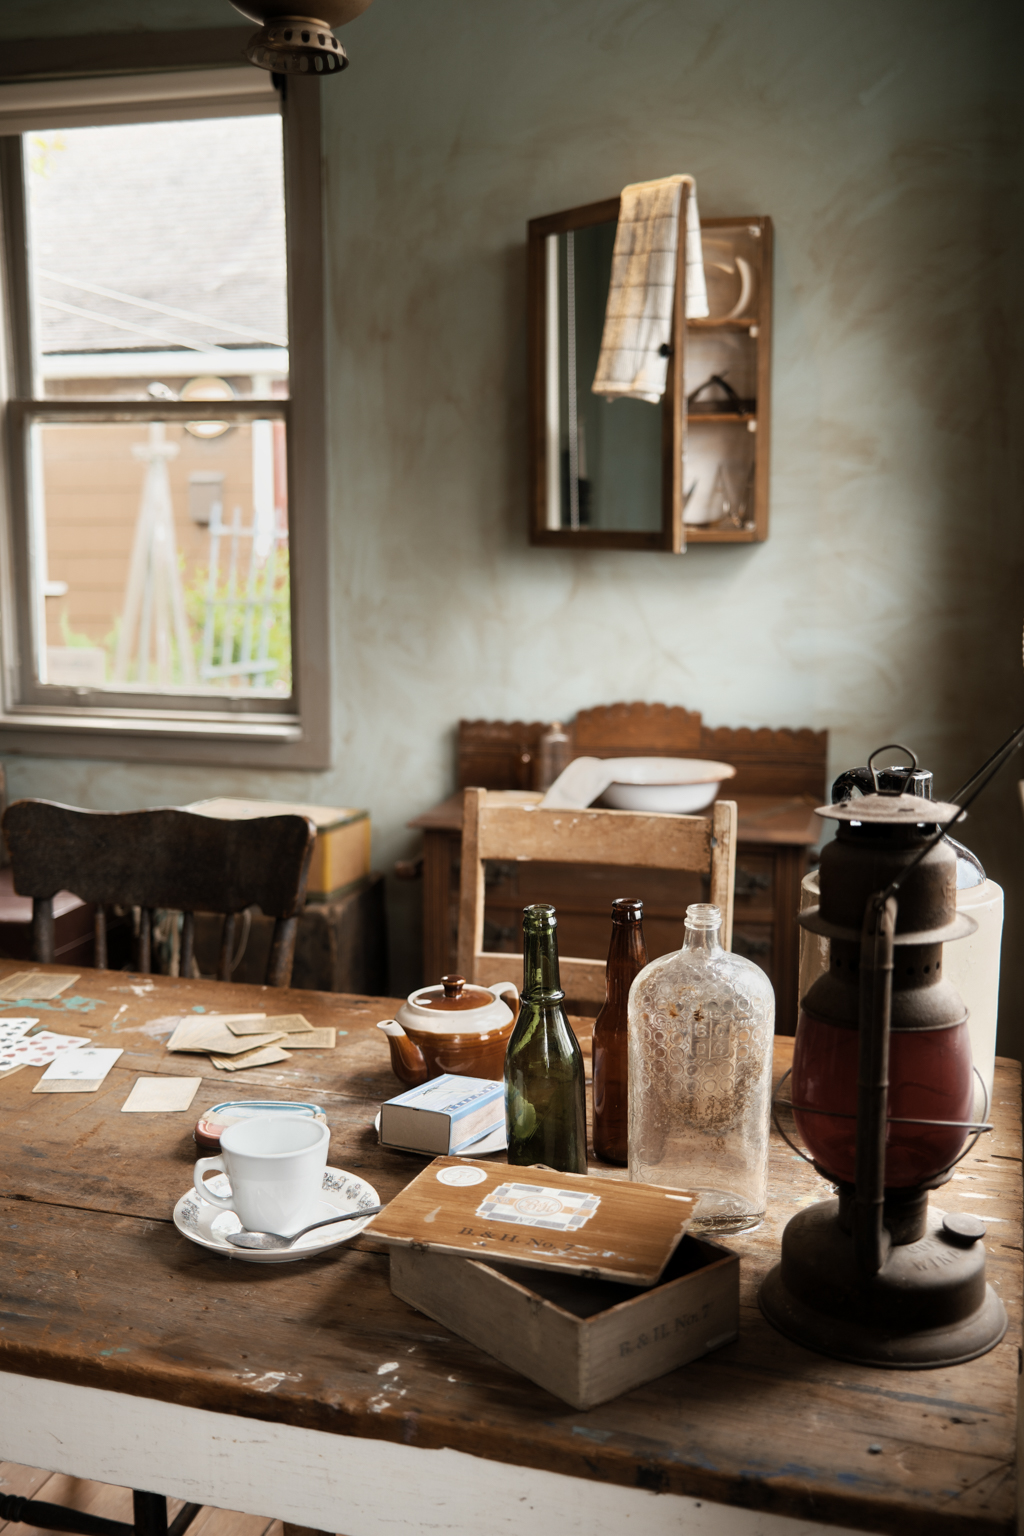
Here are some samples photos, which first created by SilkyPIX, and later on I tried to create a Fujifilm film simulation recipe for leisure shooting with fun.

Left: Result from SILKYPIX, Right: Result from my recipe applied from Fujifilm XRS

Left: Result from SILKYPIX, Right: Result from my recipe applied from Fujifilm XRS

Left: Result from SILKYPIX, Right: Result from my recipe applied from Fujifilm XRS

Left: Result from SILKYPIX, Right: Result from my recipe applied from Fujifilm XRS

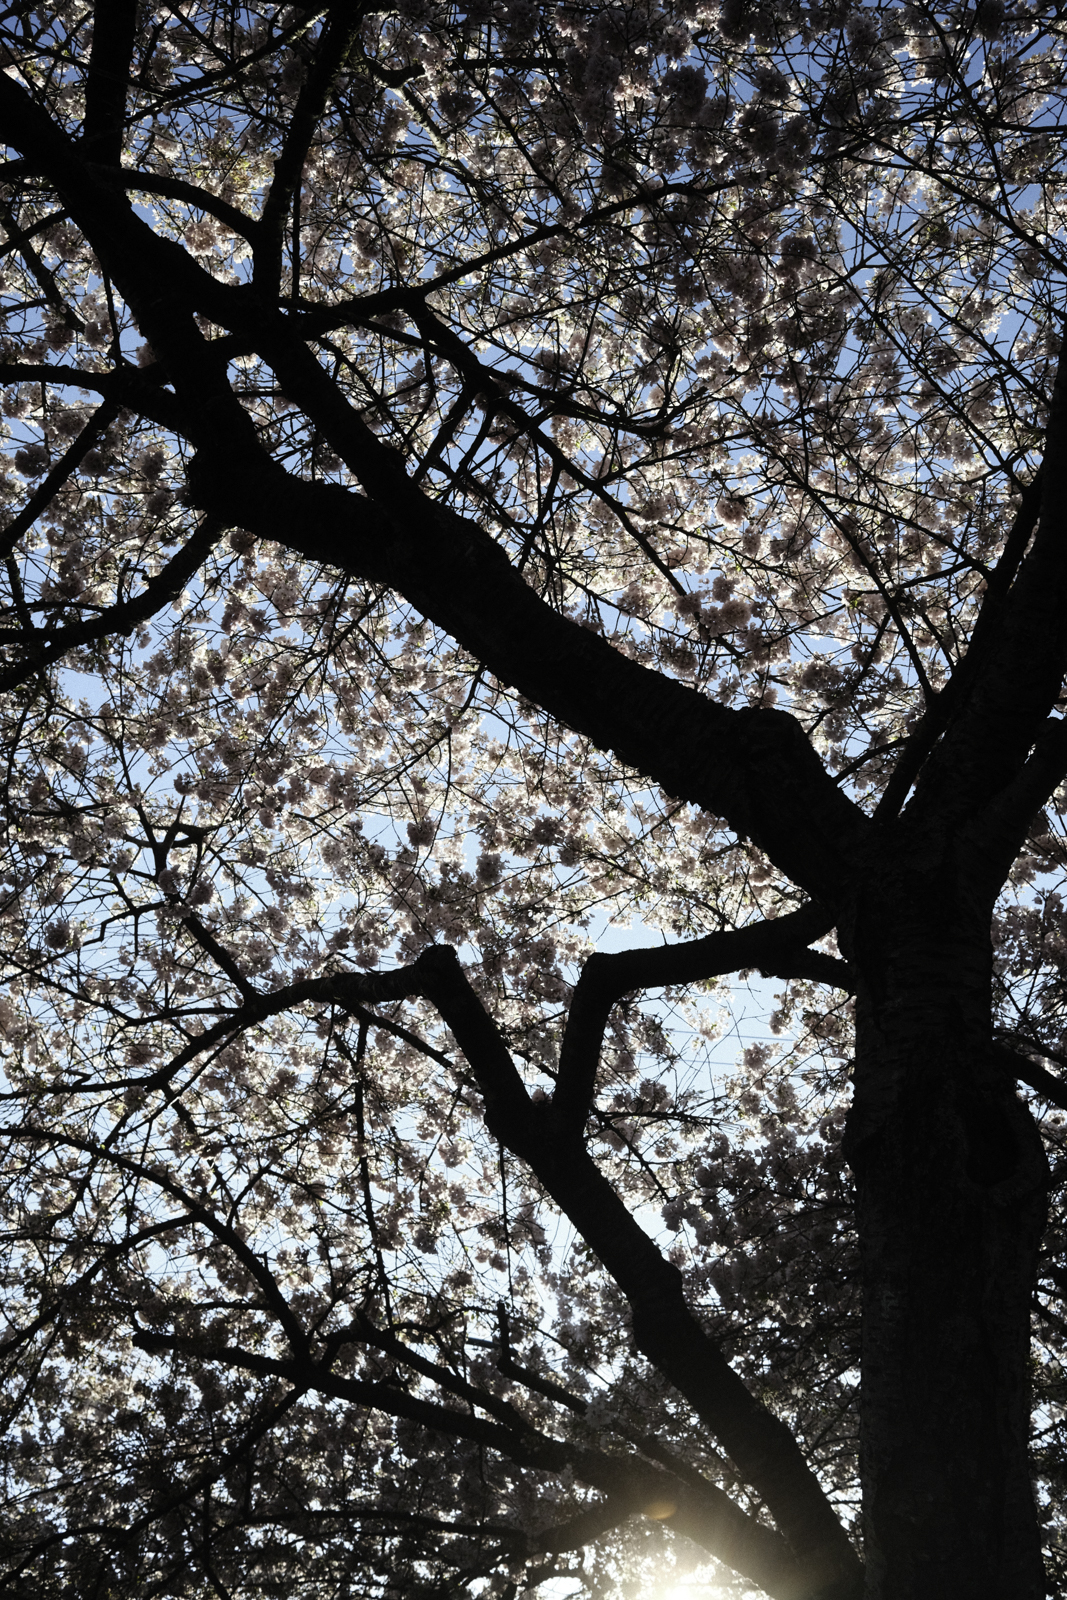
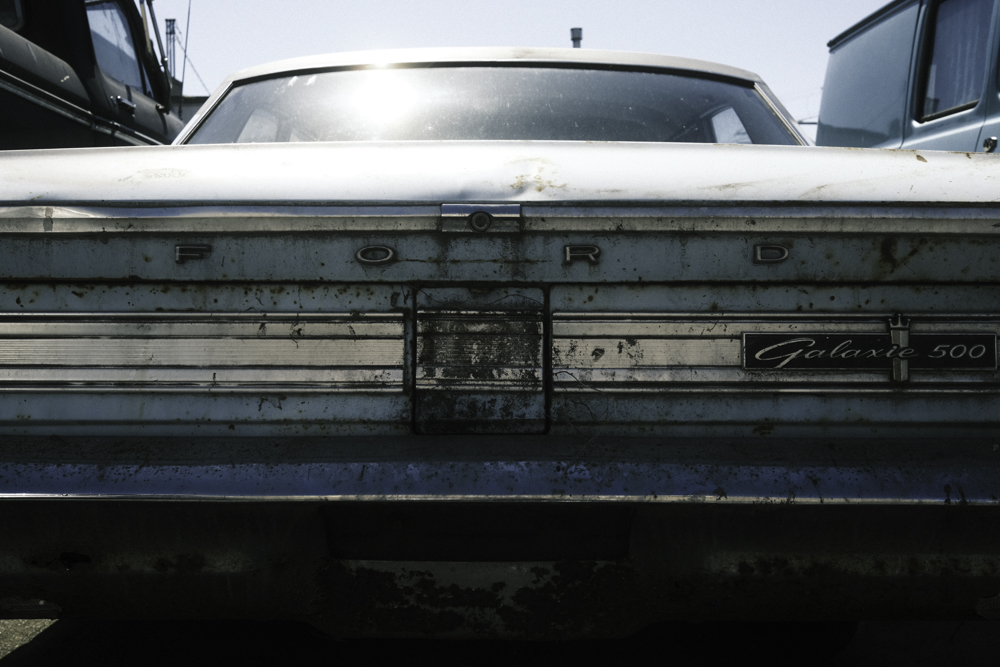
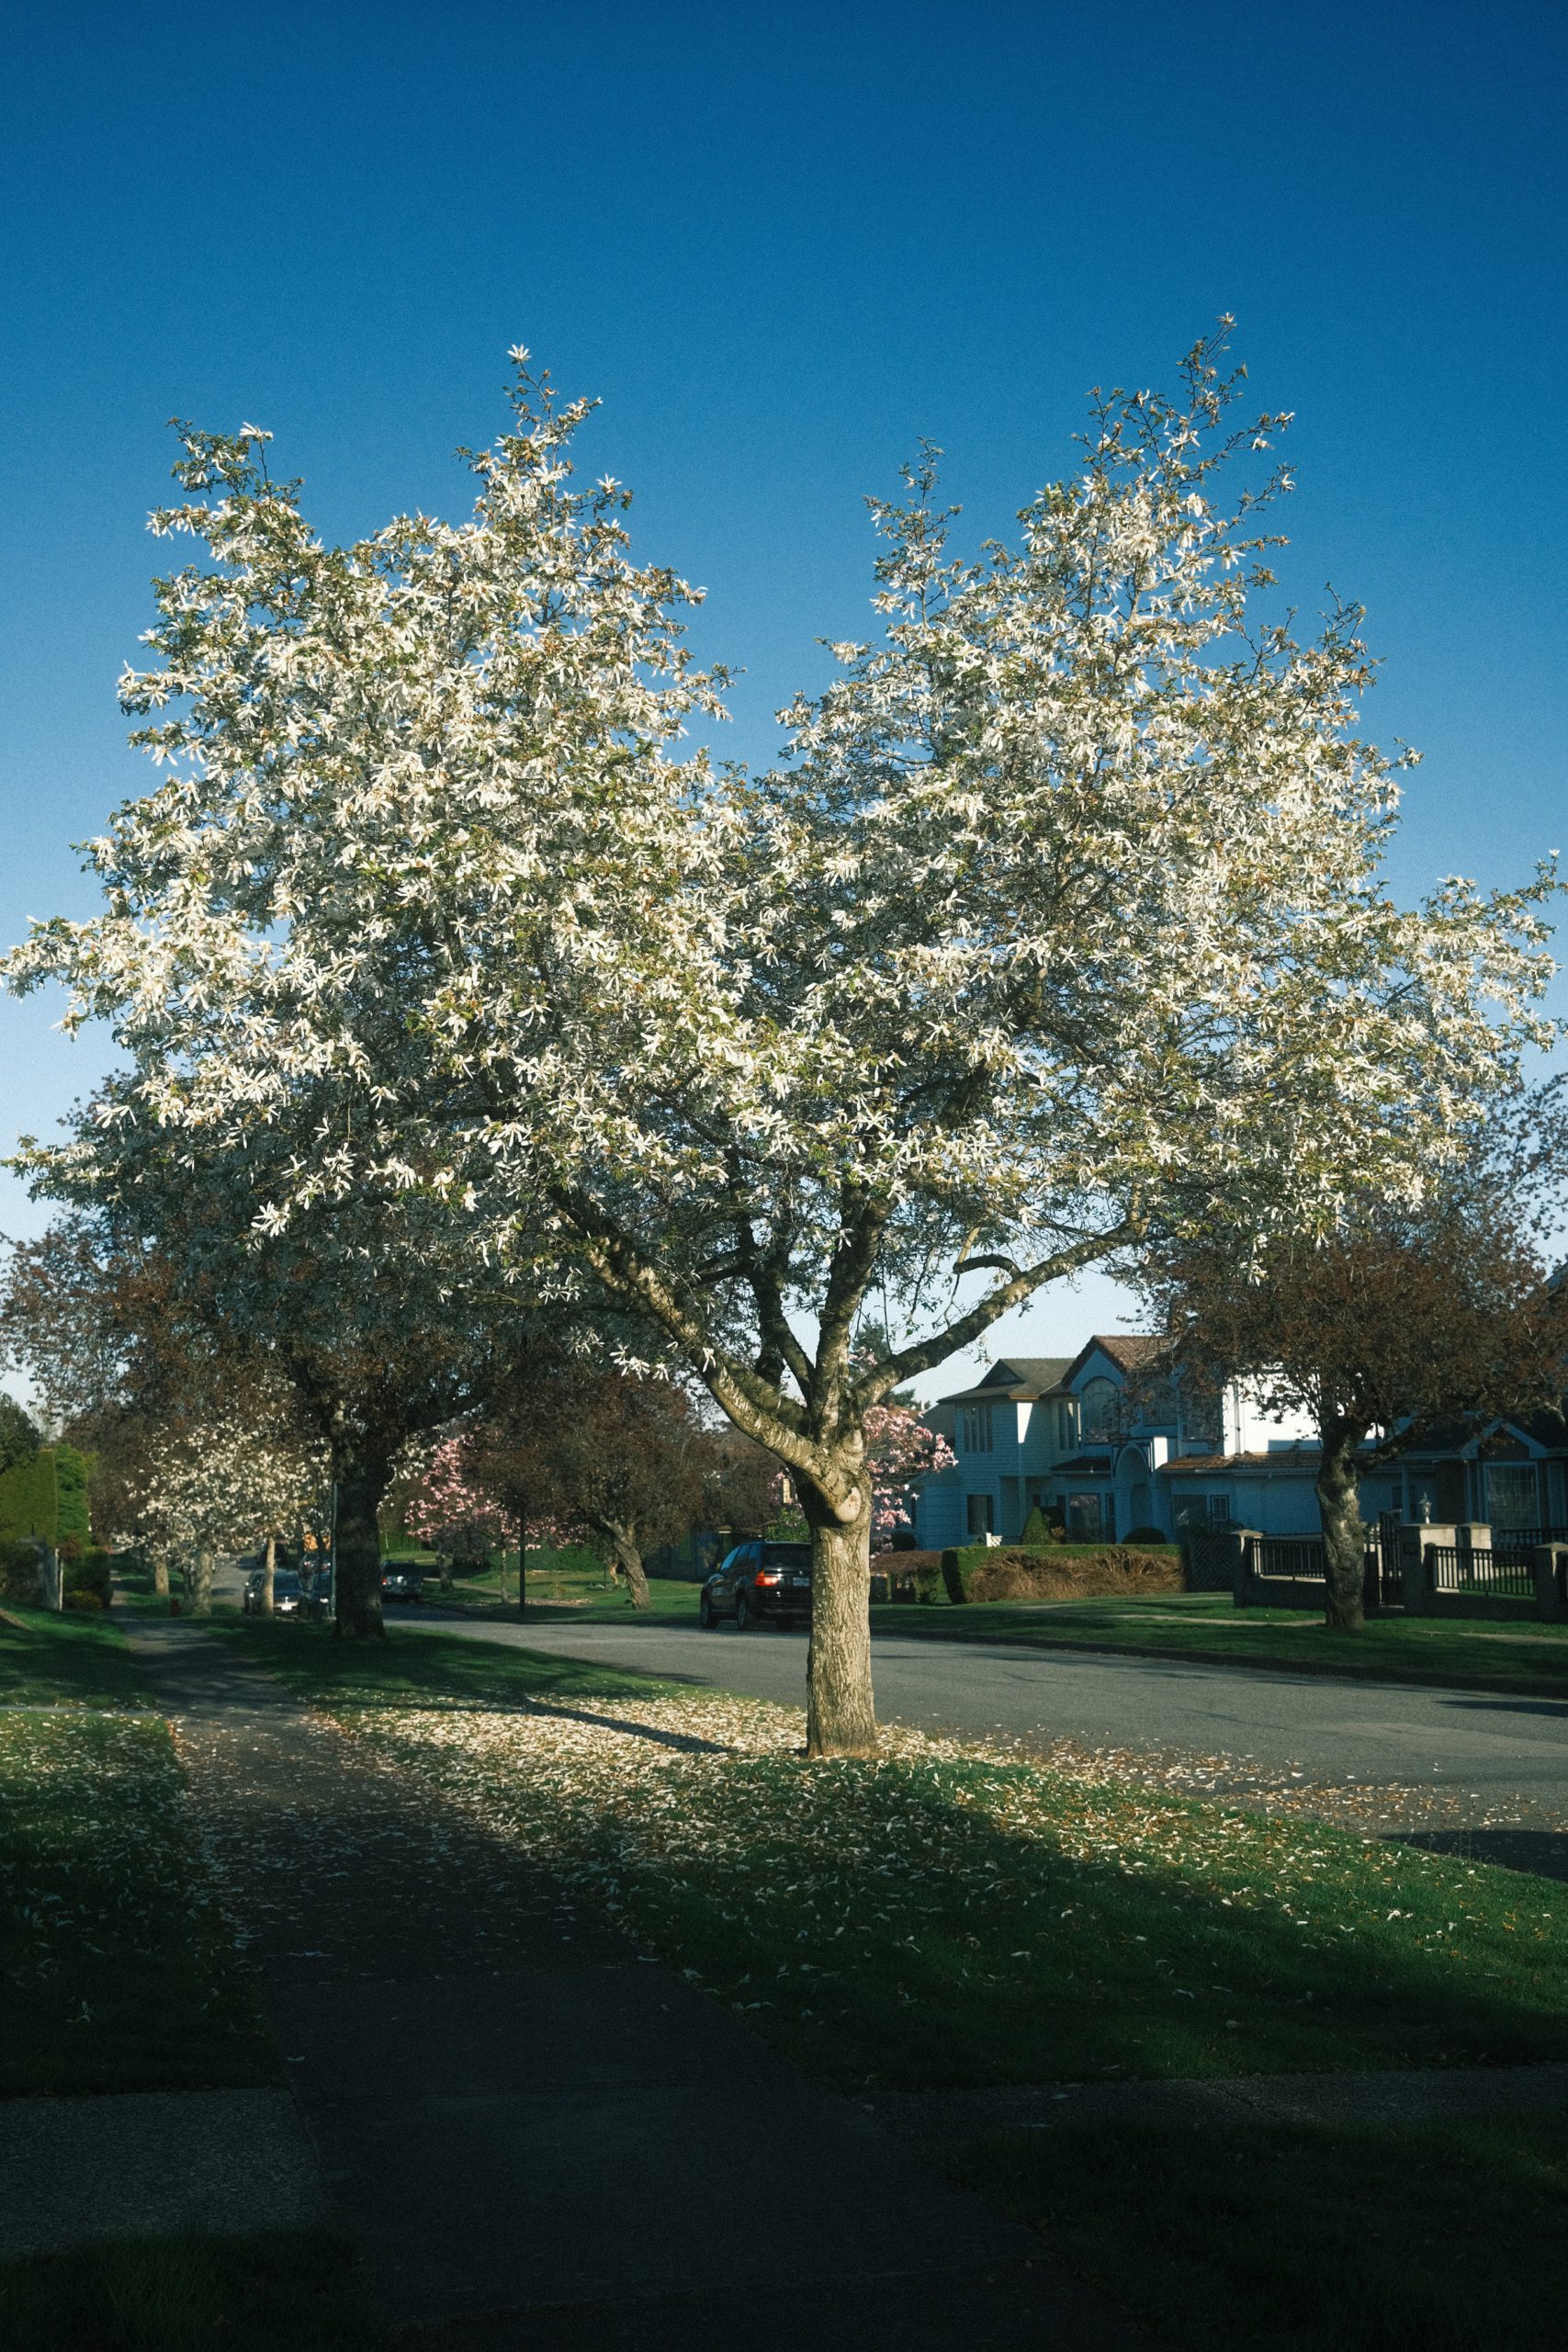
Here are my “old” photos taken recently with my X100V, applied with this new recipe:

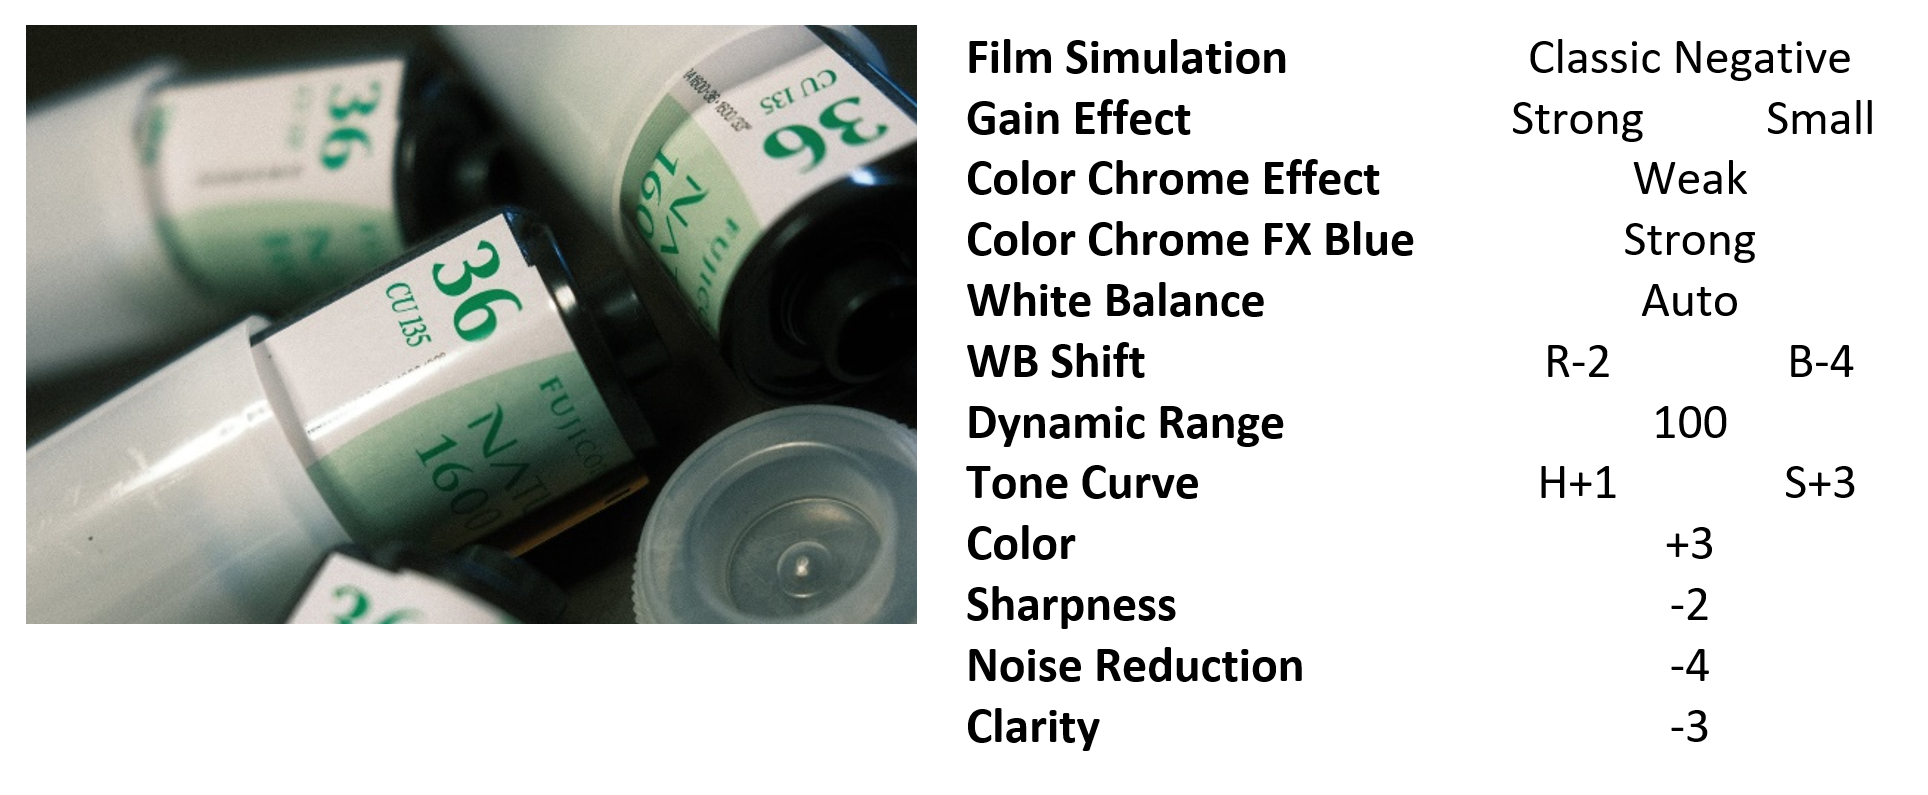
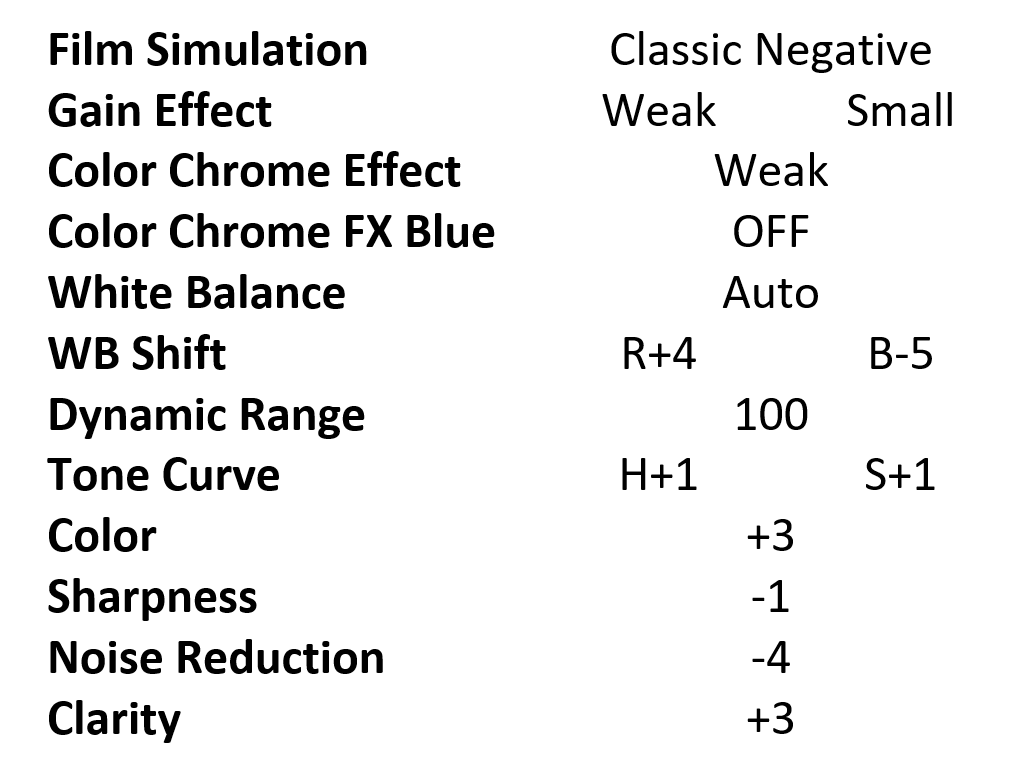
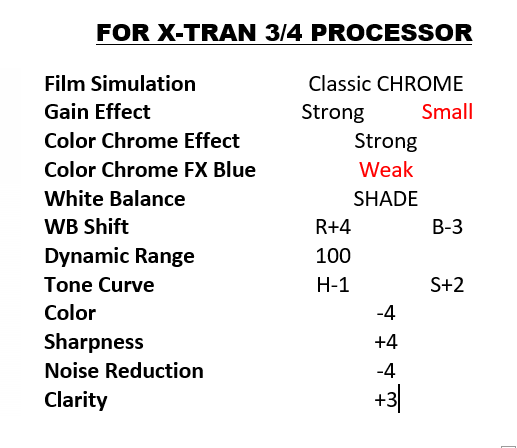
The X-Trans III or IV recipe for making these images:

Recipe for Browish, Vintage-look using Classic Chrome

Enjoy!

Let’s Try! Amazing, Unqiue Natura 1600 recipe for X-Trans III and IV!

8 0
Read Time:2 Minute, 27 Second

I feel excited when I’ve created my first own recipe few weeks ago for my X100V (X-Trans IV processor), which works really really great to me on daily snapshots. I’ve also tweaked it into version 2.1 during the past weekend, and I love that so much. If you’ve missed the recipes so probably you don’t know what the “cooked images” look like, please refer my previous blog post here.

As these X-Trans IV recipes heavily rely on the Classic Negative film simulation, Chrome Color Effect Blue and Clarity settings, some other X-Trans III/IV camera owners feedback to me that they really wanna try my Natura 1600 recipes on theirs, but they do not have such settings available.

I really appreciate all of your positive feedbacks and nice words from my post in this FB group, I’ve been encouraged a lot and thus decided to challenge myself in making a X-Trans III version.

As X100V is the only camera I have for now after I sold all my previous Fujifilm cameras, so in order to make this nice recipe I was using my existing X-Trans IV RAW files for testing. I am not sure this makes any difference to the result using X-Trans III RAW files, however, I don’t believe that will be significant. Anyway, it’s worth to be noted and if you found great discrepancies from my images, please kindly leave me feedback in my blog.

With having side-by-side comparison between the images that applied with different X-Trans recipes, using Fujifilm X RAW Studio, finally I came up my first version of Natura 1600 recipe for X-Trans III (and even X-Trans II) processor. If you don’t know what your camera processor is, take a look here.

How’s the result?

The nice, smooth transition effect from the lovely blue to bright side became weaker in this X-Trans III recipe (when comparing with my original X-Trans IV recipe). The muted blue-ish tone, which mainly contributed by the strong Chrome Color Effect Blue, was missing due to the blue-ish effect was solely relying on the WB Shift tweaks now.

If you ask me whether it still looks like the actual Natura 1600 film, my answer is “I really don’t know”. What I can conclude is that this recipe could reproduce about 80-85% look and feel of the images created by X-Trans IV original recipe, and that is yet another great recipe that you should try by your own to feel it.

Here are the sample images created by this X-Trans III recipe. I’ve tried that on most of my previous images posted in the FB Group, so you could have a gut-feeling of the expected results:

Here you go, and please don’t forget to credit my blog if you would like to share the recipe with your friends. Thanks!

Enjoy!

My Own Recipe – Natura 1600 ver. 2 for X-Trans IV

10 0
Read Time:2 Minute, 9 Second

If you like my own Natura 1600 recipe, you’ll probably love this 2nd version. In this new version, I’ve tweaked them a lot so that it looks a lot better in both indoor and outdoor shots when comparing with the previous one. This recipe makes the image looks a little bit more greenish by using WB Shift, a lot stronger shadow and less sharpening. (Please also read the UPDATE note in the bottom of this article that I remarked on 2021.05.02)

I’ve tried few indoor shots using this recipe, and I am satisified with the result. I’ve also tried the built-in flash of my X100V to take some portraits during the sunset/low light environment. It really looks great as the images look like they were taken with my Natura Classica point-and-shoot camera in my old days. Kudos to the the classic negative film simulation! (I am not going to post any testing portraits here, as I don’t wanna put myself/my family photos here.)

Most of my previous Natura 1600 photos were taken with point-and-shoot cameras, so it is a little bit difficult for me to compare on the results of the sharpness & clarity. I still have 4 rolls in my fridge although they expired in Dec 2019. I am sure I will shoot with one of them using my Leica gears soon, which presumably the images could be as sharp as taken with X100V, for a more decent comparison. Anyway, because of the high ISO, that most probably could be taken in indoor/low light environment as my camera shutter speed is up to 1/1000s. Let’s see!

Here are the sample images taken with my X100V and BPM 1/8 [Note #1], all SOOC with auto-rotate using Snapseed:

Thank you for reading and your appreciation to my recipe. Here are the detail settings that you may want to try:

Enjoy!

UPDATE (2021.05.02): If you want a warmer look of the image, you may try another WB SHIFT Tweak using R:-1, B:-6. I would say this tweak generates a more filmic image after I’ve tried applying it on same set of the images above.

Note #1: If you haven't heard about Diffusion Filter, like the one I'm using from Tiffen - Black Pro Mist, you may take a look from their website here and see how's the effect of their diffusion filters are. Again, it's not an adveristment and I've no affiliation with any company or organization. I built this website by my own.

My Own Recipe – Metro Style in warm & contrasty tone

4 1
Read Time:39 Second

After making a very satisfactory result with a so-called Natura 1600 recipe for X-Trans 4 CMOS sensor on my own, I decided to make another one that looks something like Kodak film, but again, with more unique and consistent style for myself. I love their warm, brownish tone, and I’d love to add extra contrasty to the images for my general snapshots. #MyStyle

I can’t get a cool name for this recipe yet, and if you have any good idea of it, please feel free to make comment below.

Here are the photos taken with my lovely X100V (JPEG SOOC, resized using MS Paint) using my recipe:

The X-Trans 4 recipe for making these images:

My X-Trans 4 recipe for a warm, contrasty tone